Creating and serving a site using Jekyll
The preconditions for creating and serving a Jekyll site locally are having installed the following applications:
- Ruby
- Jekyll
If the required applications are not present on the system, a tutorial on how to install them can be found on the following link:
How to install Jekyll on Windows
Creating a Jekyll site
Open a command prompt (Start Command Prompt with Ruby)

navigate to the location of where the project shall be located and type the following command:
jekyll new nemanjas_blog
Where nemanjas_blog is the name of the project.
The project can now be opened with any editor that a user is comfortable with.
Serving a Jekyll site
Open a command prompt (Start Command Prompt with Ruby), navigate to the directory of the project and run the following command:
bundle exec jekyll serve
This command should be run only the first time, after which only the following command should be enough:
jekyll serve
The server address shall be displayed in the command prompt window where the site is served.
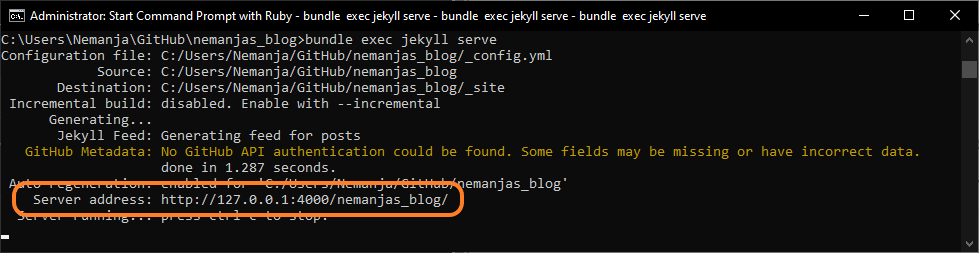
Note that the 127.0.0.1 is actually the localhost so the local site can be reached through the address http://localhost:4000/nemanjas_blog/ as well.
There is also a way to serve draft pages as well with the following command:
jekyll serve --draft
Keep in mind that running a Jekyll server with the default configuration would restrict access to the served site only to the local PC and computers in the same network like mobile devices wouldn’t be able to connect to the server using the server’s IP address. In order to overcome this, the following command is used:
bundle exec jekyll serve --host=0.0.0.0
Using this command, the served site is served to the entire network and is hosted on the local IP address of the server PC which can be obtained with ipconfig command as seen in the picture below.
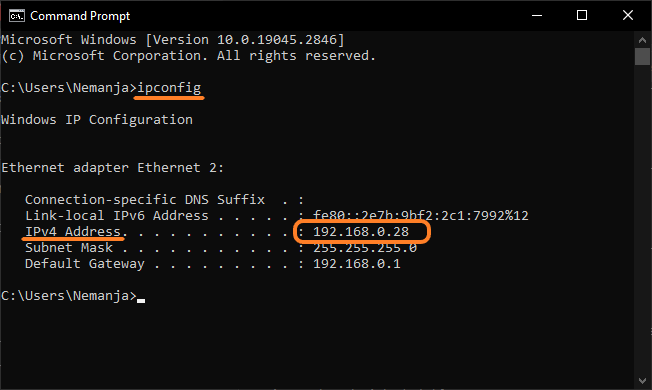
In the given example, the address through which the locally hosted Jekyll site can be reached would be http://192.168.0.28:4000/nemanjas_blog/ with the address of 192.168.0.28 corresponding to the address of the server PC obtained with the ipconfig command. Now the site could be reached by every device connected to this network.